
~ The Process ~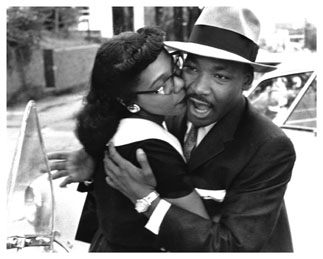
Photo by Charles Moore
| |||||
|
DAY 1: Getting started: As a group, examine the bullet points that each of the four timelines need to cover. Once your teammates are familiar with the scope of the entire project, discuss and make timeline assignments. Each member of your group must be responsible for one time line. DAY 1-3: Gathering information: Remember, this assignment requires that you not only explain the relevance of your bulleted points to the Civil Rights Movement, you must also chose an image to illustrate each point, and place the event in proper sequence on the timeline. Since the space on the timeline is limited, you must be brief and to the point. (Hint: There are timeline links on the resources page, you can use those timelines as a starting point.) Sources must be documented, remember to get the URL and the date you accessed it and the name and author of the article. Cut and paste the URL into an individual word document for each subject you are examining. Take the time to note take directly into the word document and collect any specific quotes. Refrain from cutting and pasting large pieces of text. This will count against you. The objective is to examine the issues, people and events, so you must take a close look and determine the essential contribution of the event, person or issue. Collaboration: Working as a team is an important part of being in a group, you must communicate and organize together. For instance, you must have timeline increments of equal size, for instance 10 year increments. Everyone must have the same size intervals. For example, ten years will equal five inches. The timeline details are something you must consider as a group. Groups will meet daily during the last ten minutes of class to discuss findings and the progress of the project as a whole. Your collection of data must be compiled to make an electronic presentation of a timeline by using Timeliner or other timeline generating software. Gathering images: Images you find must either be scanned into the computer or saved by right clicking in the image area after the image has downloaded, then right clicking again and selecting "save image as" on the context menu that pops up when you right click. Make sure that the images are large enough to be interesting and clear in an exhibit, but small enough fit into the space available. Keep track of your image and document sources as you collect information. Cut and past the URL into an individual word document for each subject you are examining.Your collection of photographs, maps, graphs, or other two dimensional media will be assembled to make an electronic presentation of a timeline by using Timeliner or other timeline generating software. DAY 4: Peer editing: Once the information and images has been collected into single word documents, one for each bulleted point, they must be edited by another member of your group. Editors must look for clarity and completeness of information, and that the information isn't too lengthy for the space provided. Use the proofreader's marks to edit your peer's data. DAY 5-8 Putting it all together: Each group member will be aware that they are a member of a team that is presenting a body of information. The project must look unified. You can make individual choices as long as there are strong unifying factors in your timeline, such as caption shapes, text color, background color, etc. Simplicity is the hallmark of all great design, so keep things simple. DAY 9-10: Document: Once you have completed the timeline, it is your responsiblity as a curator to make a statement about the theme, rationale and importance of your part of the exhibit. Compose a one page document describing at least two cause and effect relationships documented in your timeline, and have they impacted the evolution of the Civil Rights Movement. Use a word processor, and look carefully at the writing rubric on the rubric page for guidelines. DAY 11: Present: You and your team will present your displayed timelines to the class and explain one important cause and effect relationship per timeline. Hand in your collection word documents containing the information you collected on each bulleted point after your presentation.
|